The Native theme includes the demo content. You may install it and customize it in accordance with your needs. It will facilitate the website creation process and help you to understand how to create the layouts. If you wish to not install the demo content you may skip this step.
Main demo content
The main demo content includes Media gallery, Blog posts, Portfolios, Menu, Custom pages (like About, Features, Contacts, etc.).
Before installing a shop layout or to be able to import products, make sure that the WooCommerce and YITH WooCommerce Wishlist plugins are installed and activated on your site.
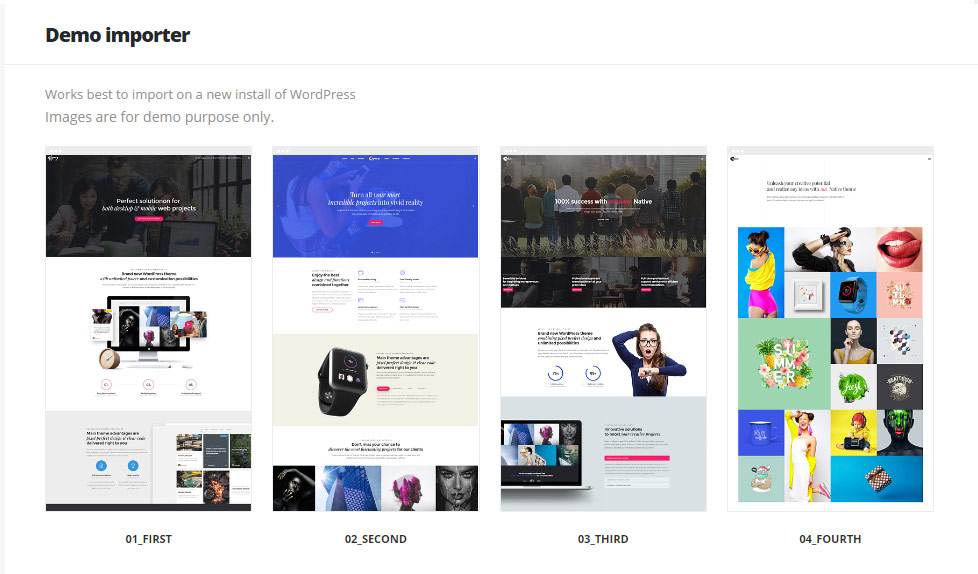
Demo Layouts
You can also install any layout available in the demo. Upon installation the layout content, media gallery, options, together with posts, portfolios, and slider (if it is used in the demo) will be imported.
It is important to know, that every new layout installation via Demo Importer will overwrite the existing options and sliders. Be careful before running the installer again if you’ve already customized a website.
We recommend you to use the WordPress Importer option in case you need to install several layouts.
Demo Content Installation
Check the available ways to install main demo content on your site effortlessly withing several minutes.
Watch the video tutorial on demo content installation for more details.
There are two methods of importing the content – Demo Importer and WordPress Importer.
Please, note that the menu is included in the Main demo content (in Demo Importer page it is titled Home and additional pages (such as about us, contact us etc.) are included to the layout titled Pages) and it’ll be imported every time you run the main content installer. The menu elements will be added with every new installation and can slow down the site.
Please, navigate to Appearance Menus section and delete the menus before every new Main Content installation.
- Demo Importer – the best and simplest way to import the needed content in one click.
Simply, navigate to Theme options Demo Importer section and select what content you’d like to import, click on the required content to run the Installer – the layout content, assigned posts and portfolios, revolution sliders, etc. will be imported.
Wait till you get a message about successful installation and check the created content under Pages section, Portfolios, Posts, Revolution Slider sections etc.
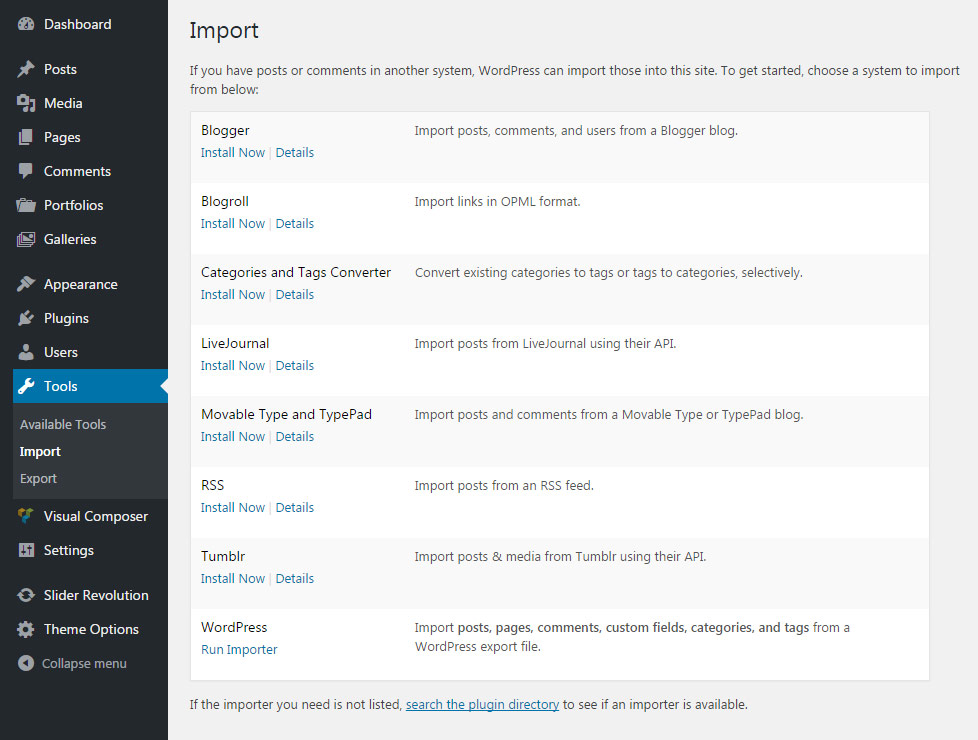
- WordPress Importer – it is the perfect way to install the demo content, if you have already installed some content or modified theme options.
Navigate to Tools Import and select the WordPress. Install and activate WordPress Importer plugin if needed.
Watch the video tutorial on WordPress demo import installation for more details.
Select the required file to import from and run the WordPress Importer.
To get the required file to import the content from, find the themeforest-19200310-
The ordinal number of every layout can be found in the URL on the demo website, e.g.:
- http://nativewptheme.net/first/
- http://nativewptheme.net/second/
- etc.
For the whole list of the available layouts you can check out the Native theme promo.
After you have installed the required content you can review it under the Pages section, Portfolios, Post sections etc.
In case you need to set the installed content via WordPress importer page as your home page, navigate to Settings Reading Front Page and select the desired page from the drop-down list.
Note, that the menu is not imported in case you are using WordPress Importer, it should be imported separately.
Sliders Import
The Sliders are not imported if you use the WordPress Importer plugin to import the content.
You may import the required sliders manually in Revolution Slider Import section. Simply select the required slider archive from the themeforest-19200310-native-powerful-startup-development-tool theme package, Mainfiles\import\ folder and run the importer.