Using single posts you can create stylish blog posts to present the news and other information for the visitors.
Before blog post creation, check the Post Categories and Tags. They will help you to group the posts and arrange them to make the navigation more convenient.
It is important to set featured image for the single post in Featured Image meta box in the right sidebar of the single post editor since there will be no content to be displayed on the blog page.
The single posts can be created using either the default WYSIWYG editor or the Visual Composer elements.
Posts categories
Posts categories are helpful in structuring the blog posts, thus the search and navigation of single posts become more comprehensive.
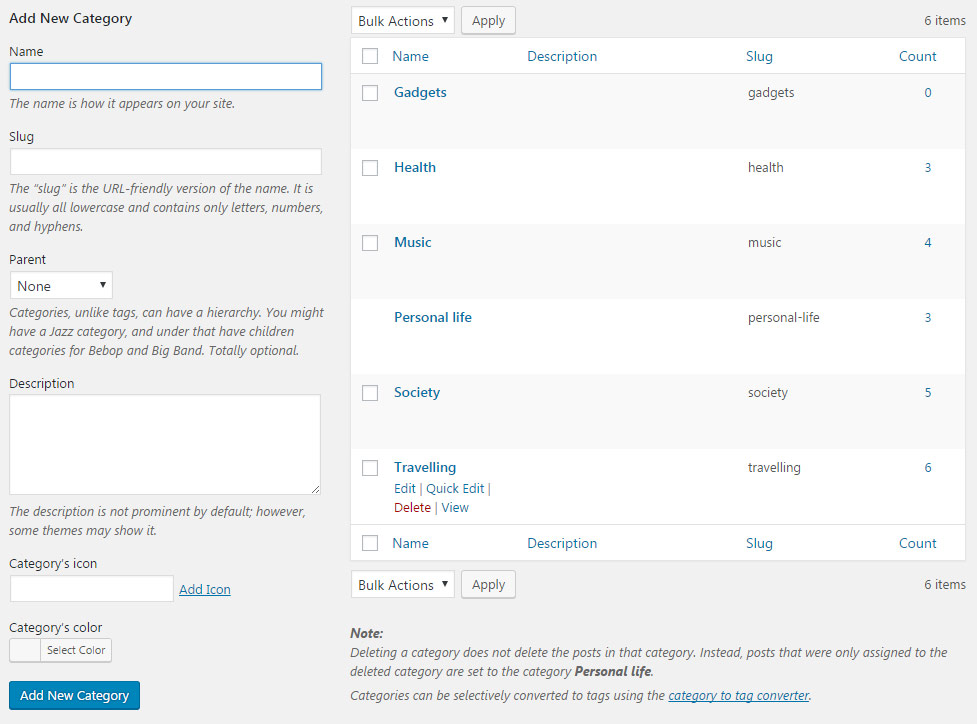
The Categories can be added in Posts Categories section of admin area.
There’s one default post category when you install the WordPress – Uncategorized. We’d recommend you to rename this category together with the Sample Post.
To create a new Category, check the steps to be followed below:
- Name – add the title of the category.
- Slug – enter the title of the category in the URL. Leave the field blank to make Slug the same as the Name.
- Parent – you may also select the Parent category to achieve the hierarchy on the site.
- Description – you may leave this field empty, the description will be visible in admin panel only.
- Category’s icon – category’s icon will be used in the Category, Tags and Author sort panel on the blog posts page.
- Category’s color – set the category’s color for category button to be displayed on single posts.
Posts Tags
Tags allow to describe the single posts and to facilitate the navigation among single posts.
The tags are also helpful when setting the related posts under single posts content to Enable since they are related to the first tag.
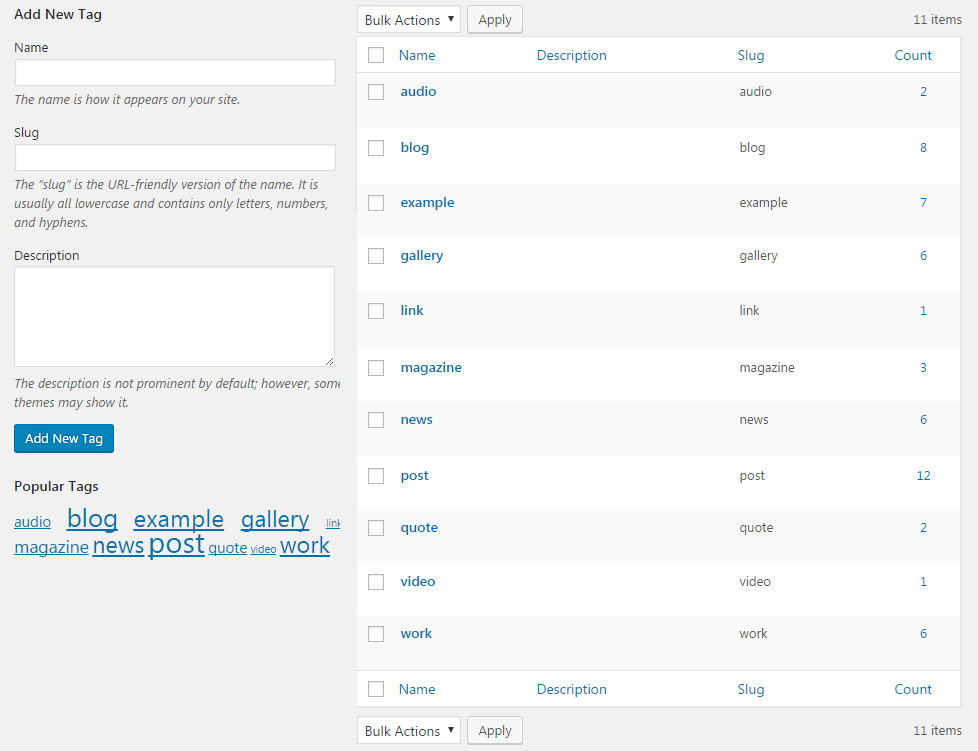
To add a new Tag, navigate to Posts Tags Add new and follow the instructions below:
- Name – add the title of the tag.
- Slug – enter the title of the tag in the URL. Leave the field blank to make Slug the same as the Name.
- Description – you may leave this field empty, the description will be visible in admin panel only, it is added for your convenience.
Posts Formats
Check the various posts types available and impress your visitors with the incomparable blog.
You may select the needed format in Format meta box while editing each single post.
Standard post format
The main format used for the single posts.
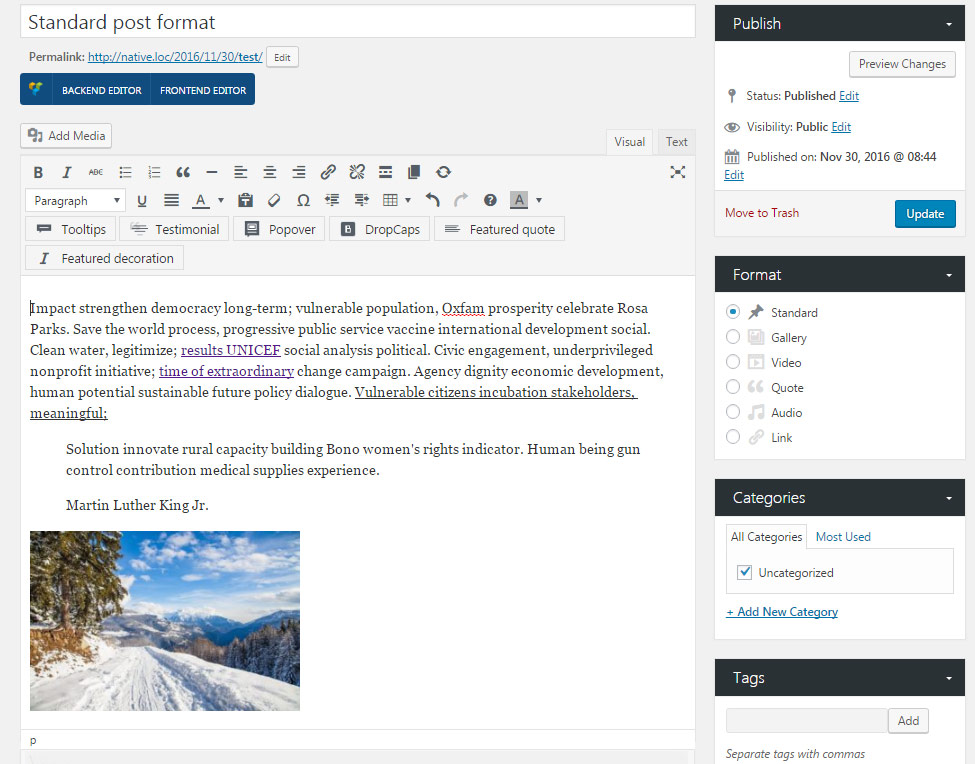
You may add post content to the WYSIWYG editor when the Standard post type is enabled.
For creating single posts, you can also use the elements from Visual Composer functionality.
First of all, make sure that the Visual Composer is enabled for posts in Visual Composer Role Manager Administrator Post types Custom section.
After that select the Backend editor and add the needed VC elements to the post.
Check the example of the standard post format following this link.
Gallery post format
Create great gallery post with images gallery on top, which is played automatically.
Watch the video tutorial on gallery post creation for more details.
Note, this post format also displays images gallery as the post featured on Blog page templates.
To create a gallery, find the Images gallery meta box in the right sidebar and add the needed images.
This gallery will be displayed before the WYSIWYG content.
The example of Gallery post can be found here.
Video post format
Allows you to create a nice post with cool video presentation.
Watch the video tutorial on video post creation for more details.
To create Video post format, select the necessary form in the right sidebar of the single post editor.
In Video Post settings meta box you’ll be able to set the video for the post.
The featured image of this post format is decorated with the play button which is linked to the single post page.
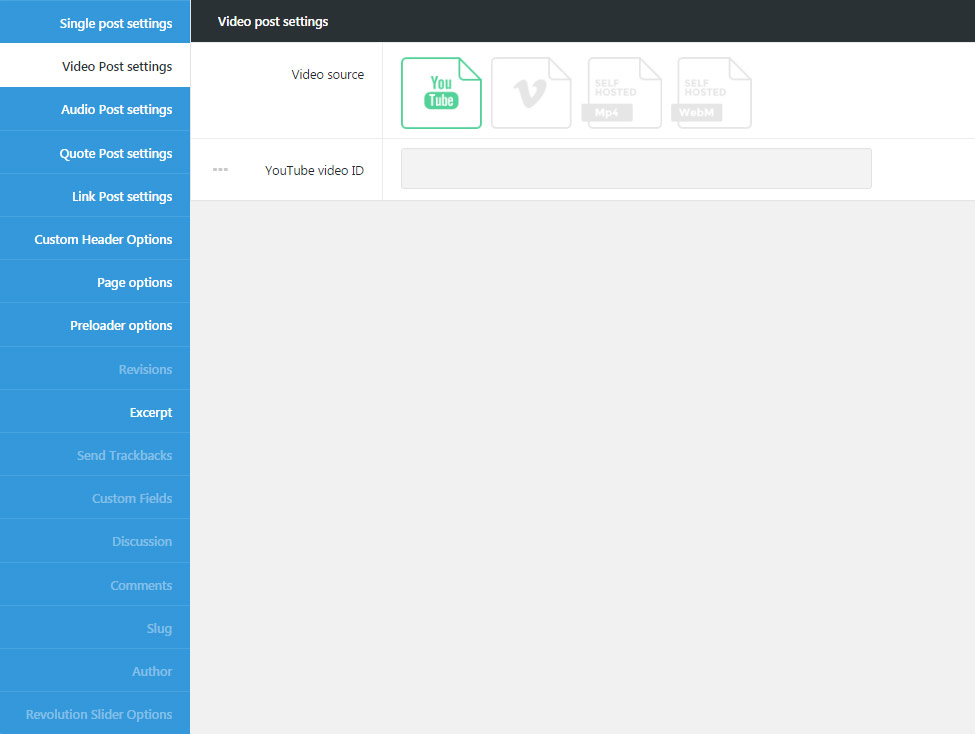
Video post settings
- Video source – select the source for the video to be displayed.
- Youtube – allows you to set the video from YouTube resource.
- Youtube video ID – enter the video ID to be displayed in video post. To find the video ID, look at the URL of that page, and at the end of it, you should see a combination of numbers and letters after an equal sign (=). Copy the numbers of an equal sign (=) and enter the ID.
- Vimeo – allows you to set the video from Vimeo resource.
- Vimeo video ID – enter the video ID to be displayed in video post. To find the video ID , copy the numeric code that appears at the end of its URL at the top of your browser window.
- Self hosted video file in MP4 – select for the video in mp4 format for IE, Chrome and Safari browsers.
- Self hosted video file in mp4 format – enter the video URL.
- Self hosted video file in WebM – select for the video in the webM/ogg format for Firefox and Opera.
- Self hosted video file in webM format – enter the video URL.
- Youtube – allows you to set the video from YouTube resource.
The example of the created Video post can be found following this link.
Quote post format
Customize the quotation and author for your site in a stylish blog post presentation.
Watch the video tutorial on quote post creation for more details.
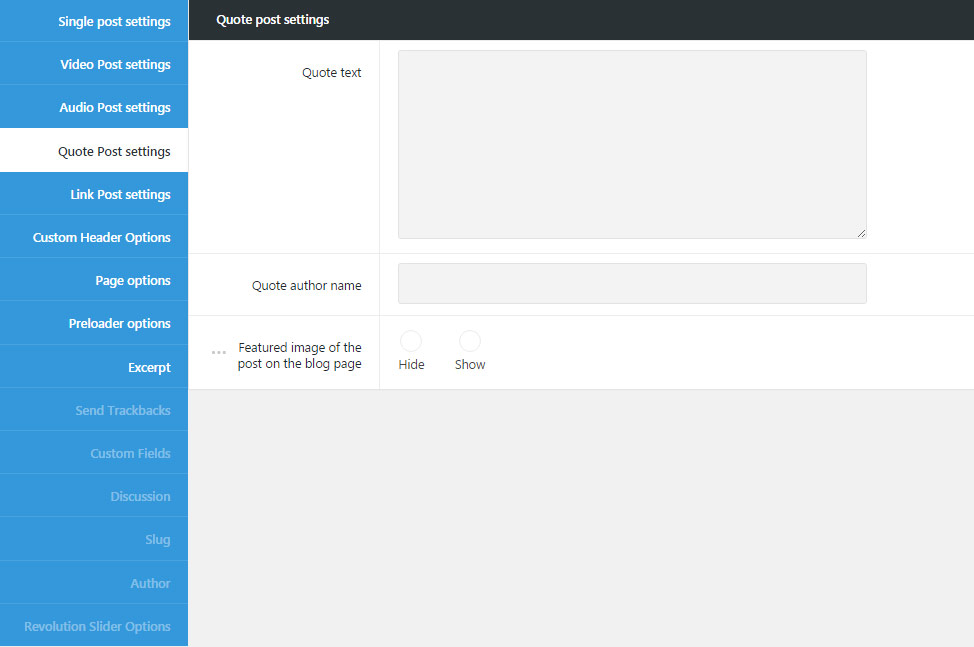
The Quote Post settings meta box available in single post editor will be helpful to you with creating the post with the quotation for your blog.
Quote Post settings
- Quote text – enter the text of the quotation.
- Quote author name – enter the name of the author for the quotation.
- Featured image of the post on the blog page – this posts type can have the featured image be shown or hidden on the blog page. Set it to Enable if you’d like to show the featured image of quote post.
The example of quote post can be checked with this link.
Audio post format
Add the post with audio files inside to diversify the blog.
Watch the video tutorial on audio post creation for more details.
The featured image of this post contains the play icon which enables playing the audio file in lightbox.
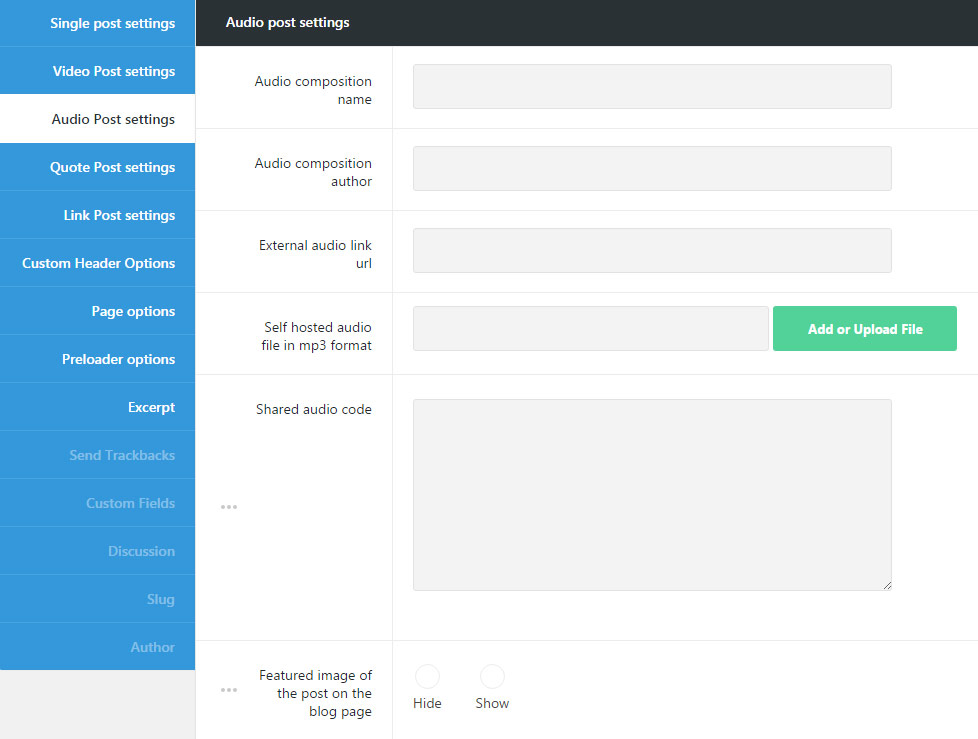
Audio Posts settings
- Audio composition name – enter the title of the audio file to be displayed in single post page.
- Audio composition author – enter the authors’ name for the audio file.
- External audio link URL – enter the URL to the audio file to be embeded into audio post.
- Self-hosted audio file in mp3 format – enter the audio file URL or upload it from media library to add it to single audio post.
- Shared audio code – click Share and select an icon, or copy and paste the player link. First, click on your track or playlist’s Share button. Go to the Embed tab to preview the embeddable player of your choice and copy the code to embed audio file.
- Featured image of the post on the blog page – this posts type can have the featured image be shown or hidden on blog page. Set it to Enable if you’d like to show the featured image of quote post.
Check the audio post format here.
Link post format
Set a stylish link post for your blog using Link post format available.
Watch the video tutorial on link post creation for more details.
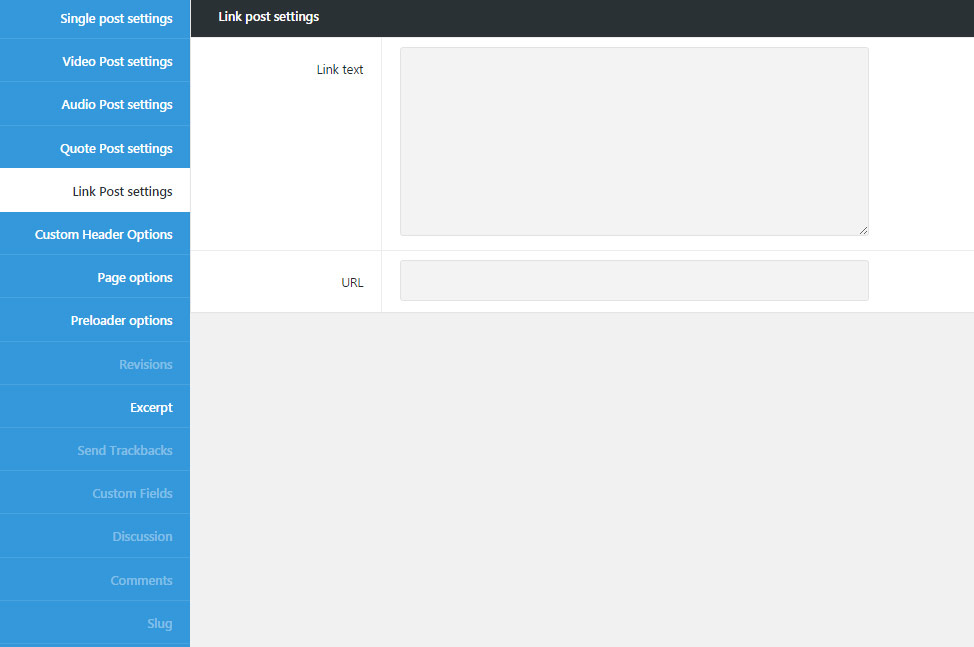
Link Post settings
- Link text – set the text for the link post.
- URL – enter the link to the page to be displayed in link post.
Check the example of link post here.
Single Post Settings
Using the Single Post settings meta box you can easily create unique and stylish posts for your blog and amaze the visitors.
The settings in this meta box will be applied to this post only and will not affect other posts of your site.
The settings for single posts are inherited from the Theme options Blog options Single post options section.
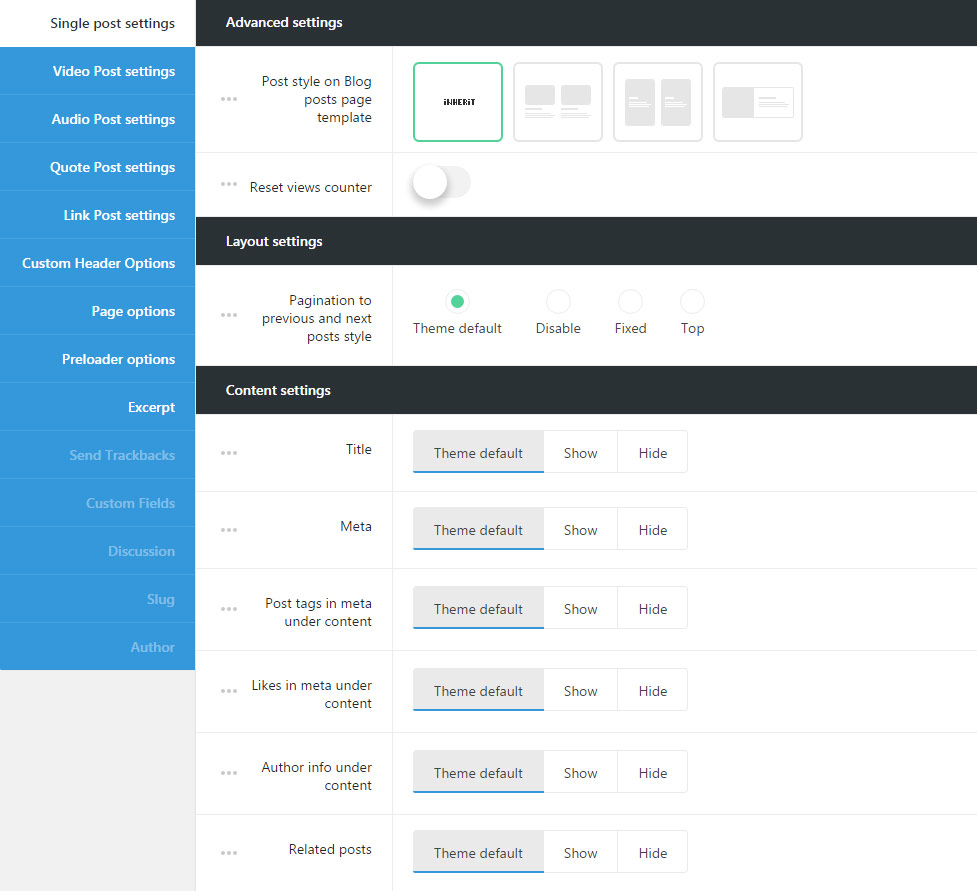
Advanced settings
Set the single post displaying on blog page to distinguish it among other posts on blog page.
- Post style on Blog posts page template – select the style for single posts displaying on blog page. If you choose theme default the displaying will correspond to the theme options settings.
- Standard – the featured image of the single post is displayed with description below.
- Featured – the featured images of the posts are set as a background of the single posts and the description of the blog post is displayed on the featured image.
- Side Image – the featured images are set aside from the description section.
- Side Image configuration – select the position of the featured image for the post style with Side Image style selected. If you choose theme default the displaying will correspond to the theme options settings.
- Reset views counter – set it to Enable if you want to reset the counter of the reviews for the blog post.
Layout settings
In this meta box section, you can easily set the inside pagination style (navigation between previous and next post).
- Pagination to previous and next posts style – allows you to select the inner pagination style for blog post. Switch it to Disable to remove inside pagination. If you choose theme default the displaying will correspond to the theme options settings.
Content settings
Customize the inner content of the post such as meta information, title, author’s information etc.
- Title – allows you to show or hide the titles of on blog post. If you choose theme default the displaying will correspond to the theme options settings.
- Meta – allows you to show or hide meta information on blog post. If you choose theme default the displaying will correspond to the theme options settings
- Date – select whether the date of single portfolio item creation will be shown or hidden on the single post page.
- Category in meta – select the category to be either shown or hidden in meta of the single post.
- Comments count – allows you to show or hide the comments count of the single post.
- Likes – you to show or hide the likes count of the single post.
- Post tags in meta under content – allows you to show or hide tags in meta on blog post. If you choose theme default the displaying will correspond to the theme options settings.
- Likes in meta under content – allows you to show or hide likes in meta on blog post. If you choose theme default the displaying will correspond to the theme options settings.
- Author info under content – allows you to show or hide author info on blog post. If you choose theme default the displaying will correspond to the theme options settings.
- Related posts – allows you to show or hide the related posts on blog post. The posts relate to each other by the first tag. If you choose theme default the displaying will correspond to the theme options settings.
Share settings
Customize social share for single post to share it on different social networks.
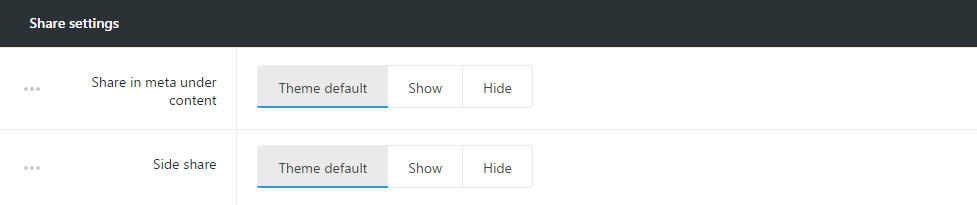
- Share in meta under content – allows you to show or hide the share in meta on blog post. The post with share in meta enabled can be found here.
- Side share – allows you to show or hide the side share on blog post. Check the example of side share here.
The social networks can be set in Theme options Social Accounts Social share options section.
Custom Header Options
Style the custom header section for your blog post if you want to add something special on your post page.
The custom header options are inherited from Theme options Header options Custom Header Options section.
The configurations set in this meta box section will be applied to the single post page only and will not affect other pages of your site.
Since the Custom Header options meta box is the same for all posts and pages types, more details can be found in Single Page Creation Custom Header Options section.
Follow this link to check the post.
Page options
Allows to select the style for the layout for your blog post.
The configurations set in this meta box section will be applied to the single post page only and will not affect other pages of your site.
Since the Page options meta box is the same for all posts and pages types, more details can be found in Single Page Creation Page Options section.
Follow this link to check the post.
Preloader options
Contains options for setting special preloader style for the single post which will appear on the screen till the content is fully loaded.
The configurations set in this meta box section will be applied to the single post page only and will not affect other pages of your site.
Since the Preloader options meta box is the same for all posts and pages types, more details can be found in Single Page Creation Preloader Options section.
Follow this link to check the post.
Excerpt
Allows to add the short description for your single post.
-
Excerpt – enter the description for your blog post to be displayed on the blog page.