Widgets are useful for creating the sidebar for the pages. In sidebars, you can add any additional information always available for your visitors.
The widgets are also necessary for creating Side Area, footer section on your site.
Watch the video tutorial on Widgets customization for more details.
Widgets
With widgets on the page, you can navigate the site easily and find the information faster.
There are default WordPress widgets available for you as well as the widgets created for Native theme.
You can find the ones that will match the styling of your site and help you to promote recent posts, best-selling products or add extra categories navigation aimed at facilitating the information search.
We also recommend you to check the WordPress Codex regarding Widgets.
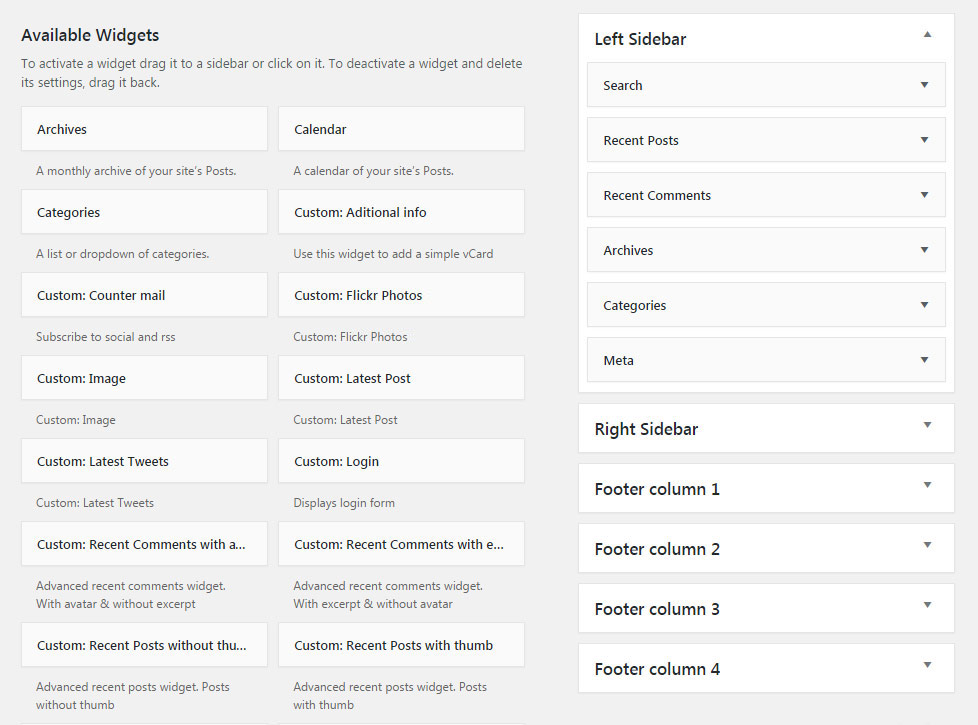
Navigate to Appearance Widgets section to check the whole list of available widgets and add them to the necessary locations.
Click on the Widget you’d like to display on the site and select the needed location to add it to.
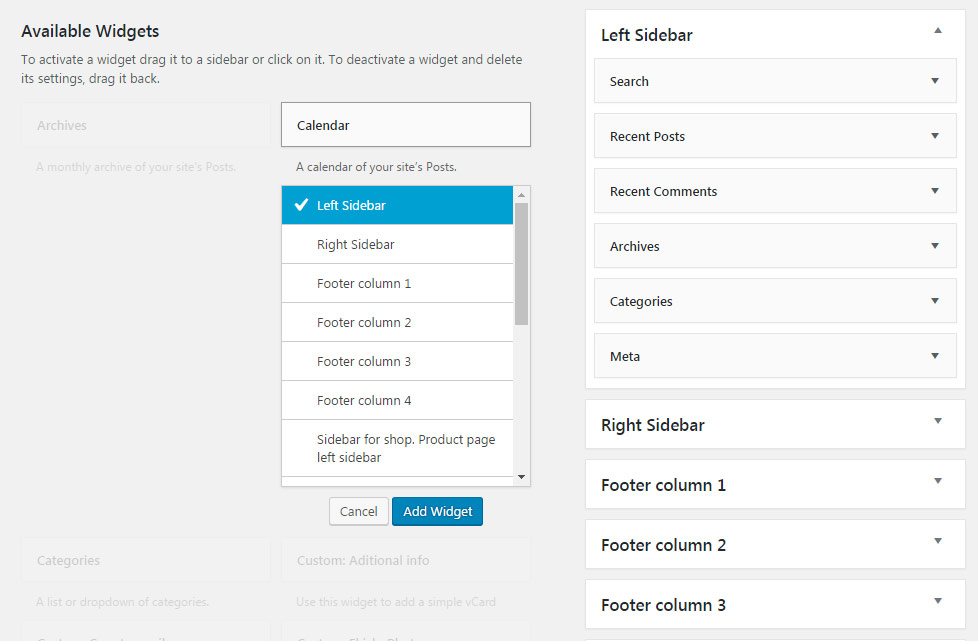
You can also drag-n-drop the needed widget to the location and place it among the other widgets.
After you add the Widget, you’ll be able to check the options to customize it (when it’s possible).
The settings, may differ depending on the widget you are customizing, however, there are some general ones.
- Title – enter the title for the widget. It’ll inherit the styles of the Widget title typography from
Theme optionsTypography/FontsWidgets typography section.
Pay attention to the Latest Tweets widget – make sure you’ve also entered all the needed information in the Theme options Social Accounts Twitter section options.
Make also sure that the ID/Username to the corresponding sections Flickr photos widgets are added – don’t use the whole profile URL.
There’s also the option to set the rounded corners for the thumbnails. Simply type the needed value to the Border radius field (without px).
You may also use Text widget to add VC shortcodes to it.
In order to get the shortcode of the necessary element, firstly, create a test page and add the needed module to it. Switch to the Classic mode and copy the shortcode. Then just paste it into the Text widget and save it.
Also, there is a wide range of the Woocommerce widgets to diversify the shop section of your page.
For Mail Counter widget it is enter Facebook App ID & Secret Key, find more details on generating the Facebook App ID & Secret Key in this post.
Sidebars
Useful site section to display extra information on the site.
Sidebars are most frequently used on the blog, portfolio and shop pages.
You may find the Sidebars and Widgets in Appearance Widgets section.
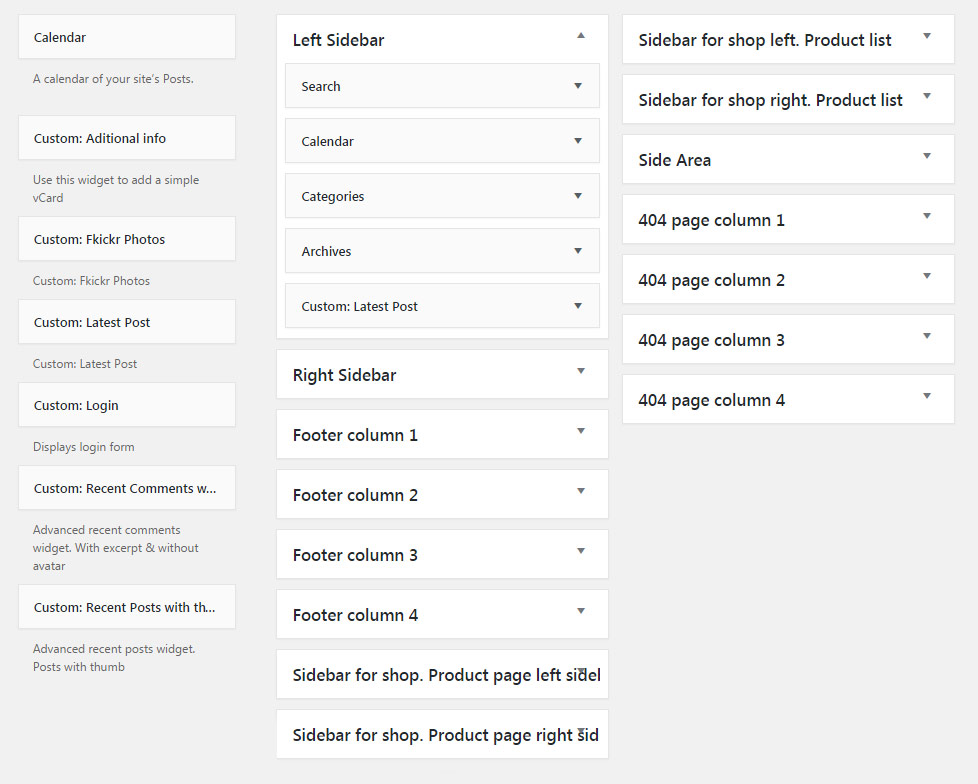
The theme has the following sidebars by default:
- Left Sidebar
- Right Sidebar
- Footer Columns (four columns)
- Side Area
- 404 Page Columns (four columns)
- Sidebars for shop page (left and right)
- Sidebar for single product pages (left and right).
However, you are able to create custom sidebars for your site.
It can be done using SMK Sidebar Generator plugin included to the theme pack.
Below you can find the short instruction on custom sidebar creation.
Navigate to Appearance Sidebar Generator section.
You may also edit the existing sidebars there.
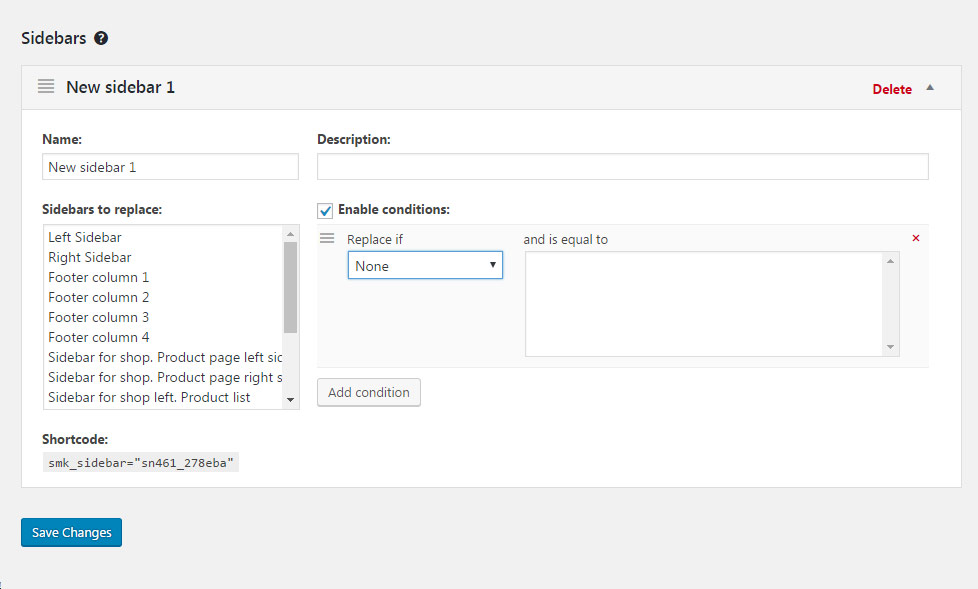
Click Add New button and the new sidebar will be created at the bottom of the list.
Enter the Name and Description for better understanding and distinguishing the sidebar (description will be visible only for you).
Select whether you needed to replace an existing sidebar with your custom one in a corresponding section.
You may also enable conditions to set where exactly to replace the sidebar.
Simply select on what post types (Posts, Pages, Products, etc.) to replace the sidebar. There’s also an option to replace it only on certain posts – you may select them in the and is equal to section. Note, multiple select also works for this section.
Add as many conditions as you need.
You may also use the Shortcode to add a sidebar on the site.
However, we’d recommend you to use Widgetized Sidebar module or add sidebar directly to the page template in the Sidebar meta box.